A quick post again! I have to confess the pics here (apart from one!) are from my mates van, I didn't take pictures when I installed my leisure battery but I did it the same way.
I bought a 110 amp/hr leisure battery off a friend who imported batteries to the U.K, sadly he has now left the country and lives in Oz otherwise I would have passed his details! I also purchased a "70-100 Amp Intelligent Split Charge System" from here.
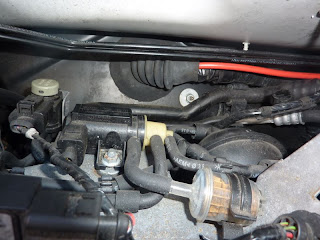
Now, on to the wiring! The first thing I did was find a grommet from the engine bay through to the cab, I decided to use this one as pictured, this comes out in the cab in the passenger foot well and then the positive wire can then be traced to the battery wherever you have decided to put it.
The next thing I did was to remove the main crank battery and fix the Volt Sensing Relay (VSR) to the side of the battery bay. Raw Components give you a full wiring diagram when you purchase the split charge kit which is really easy to follow, so I wont bore you with a step by step!
Here is the crank battery now back in place!
The next thing I did was to remove the drivers seat, a warning here though, put the van in gear and chock your tyres so the van doesn't roll away down the road!!!!
Some minor adjustments need to be done so that a 110 amp battery can fit underneath the seat, the metal base needed to be cut and a small section of the rubber flooring needed to be cut as can be seen (by the only picture of my van!!)
Finally I bought a section of threaded steel rod from B&Q and used some of the existing holes in the seat base to house the rod. As can be seen in the picture my mate used a metal strap to hold the battery down, I used the same system but I used a roof rack strap instead of a piece of metal.
Hope you have found this interesting/useful. Give me a shout if you have any questions.
Cheers
Tom


